
How to make a pretzel knot pillow?
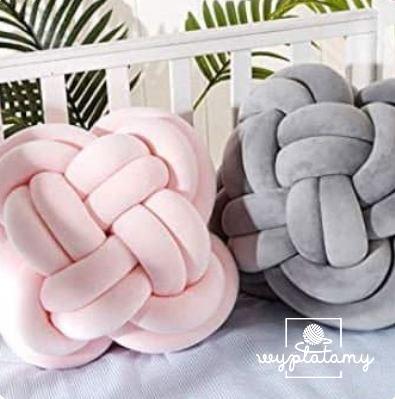
The pretzel knot pillow is a very fashionable gadget for home decoration. It looks great on the sofa in the living room or on the bed in the bedroom. Thanks to the thick yarn used to make it, it is also very pleasant to the touch. However, did you know that you can make such a pillow completely on your own? All you need is the material, a little enthusiasm and our instructions to enjoy a handmade pretzel knot pillow!
Braid it yourself: pretzel knot pillow. What do you need?
To weave a pretzel knot pillow yourself, you really need very little. To make a 35×35 cm pillow you need to prepare:
- Velvet thick tube yarn – the length needed is about 6.2 meters. Depending on how tightly you weave it, you may need a little less.
- A free moment – a quarter of an hour should suffice.
- Our instructions – of course, you can try without it, but with it will be easier 🙂
Pillow knot pretzel – how to weave
Weaving a pretzel cushion closes in eight simple steps. We will describe them in detail below, while at the very end of the article you will find abbreviated pictorial instructions and a video showing how to weave such a pillow.
Step 1: make a double loop
Making a pretzel pillow, we start by arranging two loops so that they take the shape of a pretzel. We will refer to the bottom loop as loop #1, the top loop as loop #2. It is important to remember this assignment – we will refer to it in the following steps

Step 2: interweave the fabric perpendicular to the first two loops
In this step, we create loop #3 by pulling the yarn through the first two loops. Fly the yarn so that it goes over loop #2, under loop #1, over loop #2 and under loop #1. Interweave the entire yarn – when pulling, make sure that the shape and alignment of the first two loops does not change.

Step 3: interweave the material parallel to the first two loops
In this step, we create loop #4, pulling the yarn through loops #2 and #2. 3 We start by weaving over loop 3, then under loop 2, over loop 3 and under loop 2. As in step No. 2, interweave all the yarn, making sure that the arrangement of the loops does not come apart.
At this point we already have four individual loops arranged in the four corners of the pillow. When properly interlaced, loop 4 should end where loop 1 begins. If we have reached this step, the hardest part is over – the next steps will be easier.

Step 4: Repeat the trace of the first loop
From this step we will only drag the yarn along the traces of the next four loops. So we pull the yarn along the trace of the first loop, running a new yarn trace on the outside of loop No. 1.
When interlacing, pay attention to the equal dimensions of all four loops and to make sure that the seam along the yarn is tucked underneath – this way, few corrections will be required at the end.

Step 5: Repeat the trace of the second loop
After weaving the yarn along loop 1, continue by pulling it along loop 2. All the time we run the yarn on the outside of the existing loop.

Step 6: Repeat the trace of the third loop
Getting closer and closer to the end! We continue our tour, weaving the yarn along loop 3.

Step 7: Repeat the trace of the fourth loop
We have one last loop left to weave. So, we pull the yarn along the loop No. 4, all the time remembering the rules for guiding it – on the outside of the existing loop, take care of equal sizes of the four double loops, and tuck the seam of the yarn underneath.

Step 8: Completion
We got it! At this stage, the pillow should be almost ready. Check the sizes of the loops again – if any are uneven, even out the proportions by pulling the yarn. Retract the seam underneath in each double loop.
Let’s also look under the bottom of the pillow – there are two loose ends of yarn. Sew them together to make the pillow durable. If the pillow is braided tightly and you have some excess length of yarn left, you can shorten the ends a bit before sewing them together.

Done!
Congratulations – the pretzel knot pillow is ready! Now you can enjoy your eyes with it.
We know from our own experience that first attempts can be difficult. To make it easier for yourself, it’s good to have hints at hand, so we’ve prepared them for you in two forms 🙂
Pretzel knot pillow – video instructions
Below is an instructional video prepared especially for you – I weave, and Maciek narrates. As you can see for yourself, once you catch the knack, you can make it in just a few minutes 🙂
Pretzel knot pillow – picture instructions
This is an abbreviated version of the instructions you are just reading. You can print the picture and have it at hand to quickly verify each step during the work 🙂

We hope you will find our instructions helpful. Good luck!